Here’s a list that might help those on a tight budget or any kind of budget. It’s a somewhat long term plan, 24 weeks, to build up a basic stock of supplies. I picked this up and read through it only to realize it had some bad info. That info has been taken out and/or edited so that the average person doesn’t get totally screwed by using a plastic 35 gallon garbage can with wheels as their E-kit. Not only is it not feasible as a storage container it will fail if you attempt to use it as a mobile E-Kit.
This list was originally provided by a local Department of Emergency Management. Some of the information was only barely adequate for disaster preparation and some of it was less than reliable, borderline ridiculous. Here is the adjusted list with improved and tested ideas and methods. While this list is not by any means inclusive, it is a basic starting point for anyone who has an interest in preparing for common disasters.
Technically the most expensive item would be the Rubbermaid Roughneck container(s) as most of the items can be acquired at a Dollar Store. If the container(s) are not used then all you need is storage space.
This is a list for a shelter in place scenario not an evacuation.
24 Weeks of Preparedness (Approx 6 months)
Week 1
1 gallon of water per person in your household
1 large can of juice, (Orange, Apple, etc, non-frozen)
1 hand operated can opener
Permanent marking pen
OPTIONAL:
Pet food, diapers, baby food (if applicable)
Action Steps for Week 1:
Create a color coded labeling system for perishable items; institute the FI-FO (First In-First Out) for all perishable items.
Develop a contact list of out-of-state contacts be it relatives and/or friends that family members can contact in the event of a disaster.
***
Week 2
Heavy cotton rope plus 50’ lengths of 550 ‘parachute’ cord
1 Roll of duct tape
Minimum of 2 flashlights with batteries (don’t store batteries inside the flashlights) and/or 2 shake or pump style flashlights.
Wooden stick ‘kitchen’ style matches in a waterproof container
OPTIONAL:
Extra pet leash and/or container with extra pet ID tags, veterinary records (if applicable)
Action steps for Week 2:
Contact your local fire department or YMCA and sign up for a CPR/Basic First Aid class
***
Week 3
1 gallon of water per person in your household
1 can of meat (SPAM, Tuna, etc) per person in your household
1 can of fruit per person in your household
Feminine hygiene products (these can be used for first aid as well)
Paper and pen and/or small, waterproof notebook with pen capable of writing on wet surfaces
Local detailed map of the area
Generic pain reliever
Generic laxative
OPTIONAL:
1 gallon of water for each pet in your household
Action steps for Week 3:
Find out what kind of disasters are most common to your area/region
Using your local map, plan alternate routes to known evacuation centers/areas
Develop a communication plan for family members in the event they are not home when a disaster happens
(Personally, I feel this Action Step should be at Week 1)
***
Week 4
1 LED flashlight and/or 1 hand crank flashlight
1 hand crank weather radio
1 compass
4 snap and break Cyalume light sticks
OPTIONAL:
Contact your physician and determine how far ahead you can get your prescription medications and how long they can be stored, mark them for ‘emergency use only’ and place them in your E-kit. Add contact lens supplies if applicable.
Action steps for Week 4:
Practice your family emergency communication plan, develop a family disaster meeting plan by creating emergency evacuation cards for the entire family that have the names, addresses, contact information and maps to alternative meeting places in the event of separation during a disaster.
***
Week 5
1 gallon of water per person in your household
1 can of fruit per person in your household
1 can of vegetables per person in your household
1 can of meat (SPAM, Tuna, etc) per person in your household
2 rolls of toilet paper per person in your household
Extra toothbrush per person in your household
Travel size toothbrush with travel size toothpaste per person in your household
OPTIONAL:
Special foods for those with dietary needs
Action steps for Week 5:
Identify escape routes from the home for each member of the family. Identify safe locations to go in case of local emergencies and update that information on the EEC (Emergency Evacuation Card) for each family member. Practice a drill of each of your plans.
***
Week 6
1 Basic First Aid kit to include: sterile adhesive bandages in assorted sizes, adhesive tape, gauze pads, sterile roller bandages, latex gloves and any medications needed for family members
1 packet safety pins
Bottle of sunscreen
Action steps for Week 6:
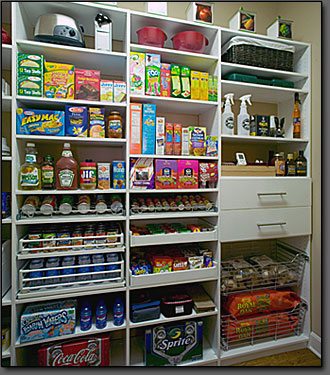
Identify storage areas within your residence such as closets along an inside wall for your family E-kit to be stored (Shelter in Place E-Kit), preferably inside a waterproof, plastic container such as a Rubbermaid Roughneck style container. DO NOT USE PLASTIC GARBAGE CANS FOR ANY REASON. This type of container is not a reliable storage container.
***
Week 7
1 can of ready-made soup (not concentrate) per person in your household
1 can fruit per person in your household
1 can vegetables per person in your household
1 sewing kit
Disinfectant/liquid/ Bleach
OPTIONAL:
Baby formula, diapers, bottles, etc (if applicable)
Action steps for Week 7:
Place a pair of sturdy shoes, preferably steel toe style work shoes/boots under your bed if in an earthquake prone area, or inside your E-kit along with a pump style flashlight, emergency whistle and work gloves. If in an earthquake prone area, these items can be placed inside a plastic bag and slid under your bed.
***
Week 8
First Aid Supplies
1 set of scissors or EMT style scissors
Tweezers
Thermometer
Liquid hand soap
Disposable hand wipes
Petroleum jelly
2 tongue depressors
OPTIONAL:
Place an extra pair of prescription glasses inside your E-kit preferably with or inside the First Aid kit.
***
Week 9
1 can of ready-made soup (not concentrate) per person in your household
Liquid dish soap
Household chlorine bleach with a medicine/eye dropper taped to the handle or bottle for use in water treatment
1 box of heavy duty plastic garbage bags or contractor style clean up bags preferably 3 mil thick with ties
Antacid
Action steps for Week 9:
Test smoke detector and replace batteries
***
Week 10
Locate a portable, waterproof container for important papers such as insurance, titles, bank account information etc. Check with your local financial institution and other agencies to determine if laminated documents can be used and accepted.
Battery power or crank style emergency radio
Non-sparking wrench to turn off utilities (if applicable)
Action steps for Week 10:
Make sure that everyone in the residence knows where and how to turn off the gas, water and electric if required to do so in an emergency.
Attach the correct tool (wrench) if applicable in close proximity to the shut off valve so it’s there when needed.
***
Week 11
1 large can of juice non-frozen, per person in your household
1 package of Zip-Loc style plastic food bags (1/2 gallon to 1 gallon size)
1 box of high energy snacks per person in your household
3 rolls of toilet paper per person in your household
OPTIONAL:
Extra batteries for your cell phone
Action steps for Week 11:
Locate pay phones in and around the area within a reasonable walking distance from your residence and along any planned evacuation routes and mark them on your family EEC.
***
Week 12
Litter and box
1 gallon of water per pet in your residence
OPTIONAL:
Keep and emergency supply of any special pet medications required for each pet in your residence
Action steps for Week 12:
Photocopy and laminate important papers and store them in your E-kit
***
Week 13
Add at least one change of clothes per person in your household that should include long sleeve shirts, long pants, sturdy shoes/boots, hats, goggles, gloves and extra boot socks
Put together a selection of commonly used spices such as salt, sugar, pepper, etc into your E-kit in a plastic, waterproof container
Place utensils such as knife, fork, spoon, plate, bowl and cup into your E-kit per person in your household
Rotate all perishables in your E-kit and remove and discard any out of date, dented or swollen cans/packages
NEVER STORE YOUR E-KIT NEXT TO SOLVENTS, PAINT OR GASOLINE, ALWAYS STORE YOUR E-KIT IN A RELATIVELY TEMPERATURE CONTROLLED AREA NEVER SUBJECTED TO EXTREME HEAT OR COLD
***
Week 14
1 whistle per person in your household
Extra batteries for flashlights, never store batteries inside the flashlight
Pry bar
Action steps for Week 14:
Check with your children’s day care center or school about disaster planning, evacuation locations and contacts. Check with your local city/county agency and workplace to determine their procedures for local disasters such as designated emergency shelters and evacuation routes
***
Week 15
1 pair pliers
2 screwdrivers, 1 Phillips style, 1 blade style
1 hammer
Strapping and fasteners for bookcases, computer monitors, televisions and other heavy items that may fall during a disaster
Action steps for Week 15:
Contact your power provider and see what programs they have for securing your water heater to prevent damage in the event of a disaster, in most cases, the stabilization kit is free or low cost.
***
Week 16
1 can fruit per person in your household
1 can meat (SPAM, Tuna, etc) per person in your household
1 can vegetables per person in your household
Action steps for Week 16:
Create an E-kit for each of your vehicles
Create an E-kit for your workplace/school
Find out what resources are available in your local area such as a neighborhood group or CERT that may be able to assist you in creating these E-kits
***
Week 17
Install child-proof latches and/or fasteners on overhead cupboards
Action steps for Week 17:
Verify and update if needed any information on your family EEC
***
Week 18
1 box of graham crackers
Assorted plastic containers with lids
1 box of dry cereal per person in your household
OPTIONAL:
Extra batteries for hearing aids
Action steps for Week 18:
Review information on family EEC, if needed, arrange for someone you trust to help your children in the event you are unavailable or at work when a disaster occurs.
***
Week 19
1 bottle rubbing alcohol
Anti-diarrheal medication
Antiseptic
Action steps for Week 19:
Add 1 sleeping bag per person in your household to your E-kit
***
Week 20
1 can of meat (SPAM, Tuna, etc) per person in your household
1 can of vegetables per person in your household
1 box of facial tissues
1 box of quick energy snacks per person in your household
1 package of dried fruit/nuts per person in your household
Action steps for Week 20:
Assemble a box of activities such as travel monopoly, cards, games and toys and place in your E-kit (Shelter in Place E-Kit. Optional for Go-Bag/Evac E-Kit)
***
Week 21
1 large, 5 gallon plastic bucket with tight lid for toileting needs
1 large roll of plastic sheeting, 2-3 mil thickness
OPTIONAL:
Denture care supplies
Action steps for Week 21:
Review insurance coverage with your agent to make sure you have adequate coverage for whatever events are possible in your area.
***
Week 22
1 box of high energy snacks per person in your household
Comfort foods; candy bars, cookies, poptarts, etc
1 box of plastic wrap like Saran Wrap
1 box of aluminum foil
Action steps for Week 22:
Install an emergency escape ladder for upper floors of your home if applicable
***
Week 23
1 camping, utility or multi-tool (Leatherman/Gerber style)
1 pair of work gloves per adult in your household
Safety goggles per person in your household
Disposable dust mask or N95 particulate mask per person in your household
Action steps for Week 23:
Photograph and burn to a CD and/or videotape the contents of your home and send copy to a contact out of town/state to store. Make additional copies and store in your bank’s safety deposit box.
***
Week 24
Begin rotating food and water supplies purchased in Week 1
Check for dented, swollen and out of date product, remove and discard as required
Check your storage area to make sure it doesn’t have extreme temperature fluctuation
Remember FI-FO, First In, First Out on all perishables contained within your E-kit
Continue rotation so that fresh supplies are always on hand
***
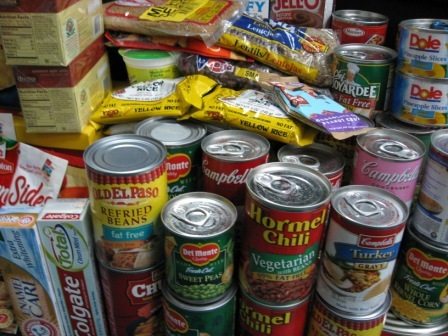
Canned meat= Tuna, Chicken, Raviolis, Chili, Stew, Corned Beef, etc
Vegetables=Green beans, Corn, Peas, Beets, Baked Beans, Carrots, etc
Fruit- Pears, Applesauce, Mandarin Oranges, Pineapple, etc
Energy snacks= Peanut Butter, Granola bars, Trail mix, Protein bars, etc
Select foods for your E-kit based on you and your family’s preferences. Always pick low salt (sodium), water-packed varieties when possible. Don’t select any foods for your E-kit that you or your family has never eaten or dislike.
Avoid high sodium content foods as those are also thirst producing items. Adjust accordingly for any health related issues, i.e. high blood pressure, diabetes, etc.
***
SAMPLE EMERGENCY/EVACUATION CONTACT CARD
FRONT
EMERGENCY EVACUATION CARD
Address 1 _______________________________ Start _______am/pm
_____________________________________Frequency ___________
_____________________________________Days ________________
Address 2 _______________________________ Start _______ am/pm
_____________________________________ Frequency ___________
_____________________________________Days ________________
Locations _________________________________________________
Emergency Phone Numbers ___________________________________
***
BACK
EMERGENCY EVACUATION CARD
Notes:
(Insert map drawing here)
Alternate Locations:
The EEC can be shrunk down to driver’s license size or increased to 3X5 index card size.